Parameter Admin provides a centralised interface to view and manage attribute values for entities.
It allows users to browse attributes, understand their types, units, and configuration, and review how measurement-related data is defined.
Opening Parameter Admin
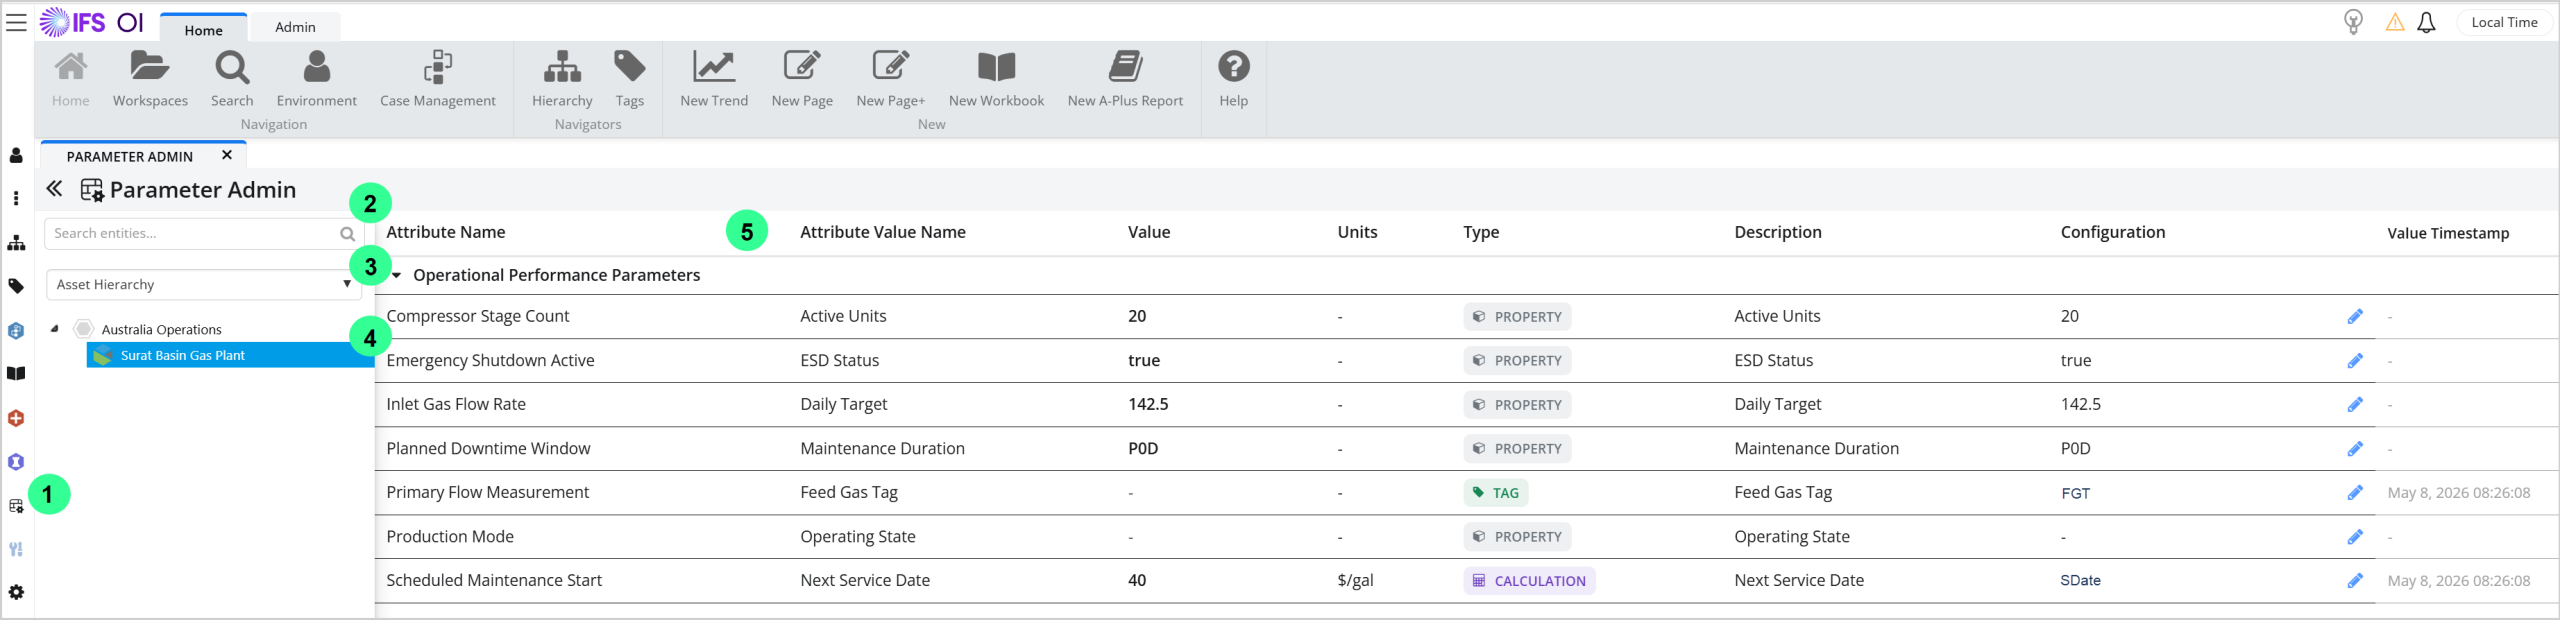
1. Click the Parameter Admin icon  in the navigation bar to open the Parameter Admin tab.
2. You can use the Entity Search to quickly find and select an entity by typing part or all of its name.
3. A hierarchy can be selected from the Hierarchy Selector dropdown.
4. Browse the Hierarchy Tree to locate and select an entity.
5. Once an entity is selected, the Parameter Admin table is displayed on the right, showing all attribute values for the selected entity.
Parameter Admin Table
When an entity is selected, all its attribute values are displayed in the Parameter Admin table, grouped by template.
Template groups can be expanded or collapsed by clicking the group header.

| Attribute Name | The name of the attribute. Each attribute may have one or more associated values. |
| Attribute Value Name |
The specific value entry of an attribute. |
| Value | The current value of the attribute. For tag-based and calculated values, this is updated dynamically based on the latest data. |
| Units | Unit of measurement associated with the value, where applicable. |
| Type |
Indicates how the value is defined. Values can be a PROPERTY, TAG, or CALCULATION. |
| Description | Provides additional context or details about the attribute. |
| Configuration | Displays the defined source of the value, such as a property value or tag name, depending on the type. |
| Value Timestamp | Indicates when the value was last updated or resolved by the system. |
Adding Attribute Value Instances
Attribute value instances can be added directly from the Parameter Admin table. This allows future values to be configured.
Click the edit icon in the Configuration column, to open the value configuration dialog.

The dialog displays the defined attribute value instances for the selected attribute.
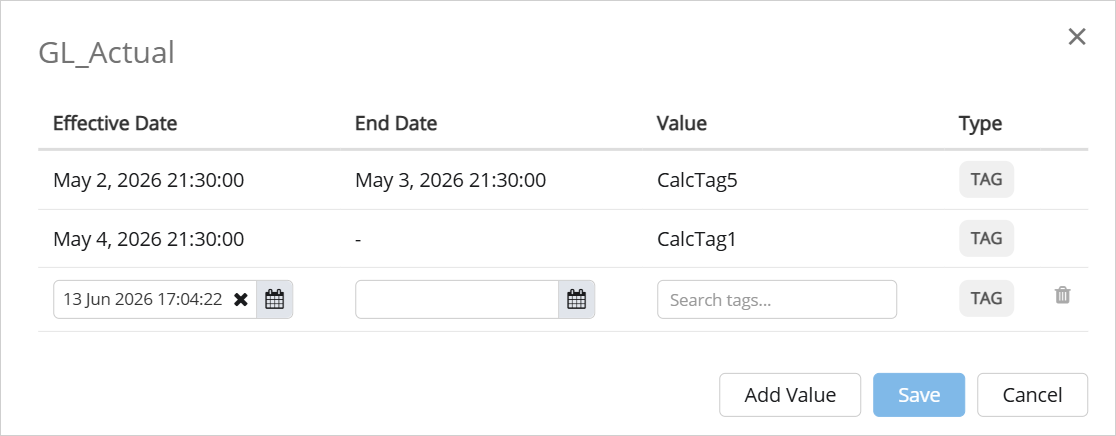
Each row represents a value instance defined for a specific time range. Existing values are shown as read-only.
Enter the Effective Date, End Date, and Value in the input fields provided. The value type is inherited from the previous instance and cannot be changed.
Click Add Value to add additional rows, if required.
Click Save to store the new value instance(s).
Note: When adding attribute value instances, values can only be defined for future time periods. New values must start after the last existing value instance end time, and overlapping time ranges are not allowed.
Release History
- Parameter Admin 26R1 (IFS Cloud Release)